
Two riders can share the same chest measurement and wear the same size in completely different ways. One may have a broader back; the other, a more defined waist. A sleeve may need length while the body is already right. This is why a good fit never begins and ends with one number.
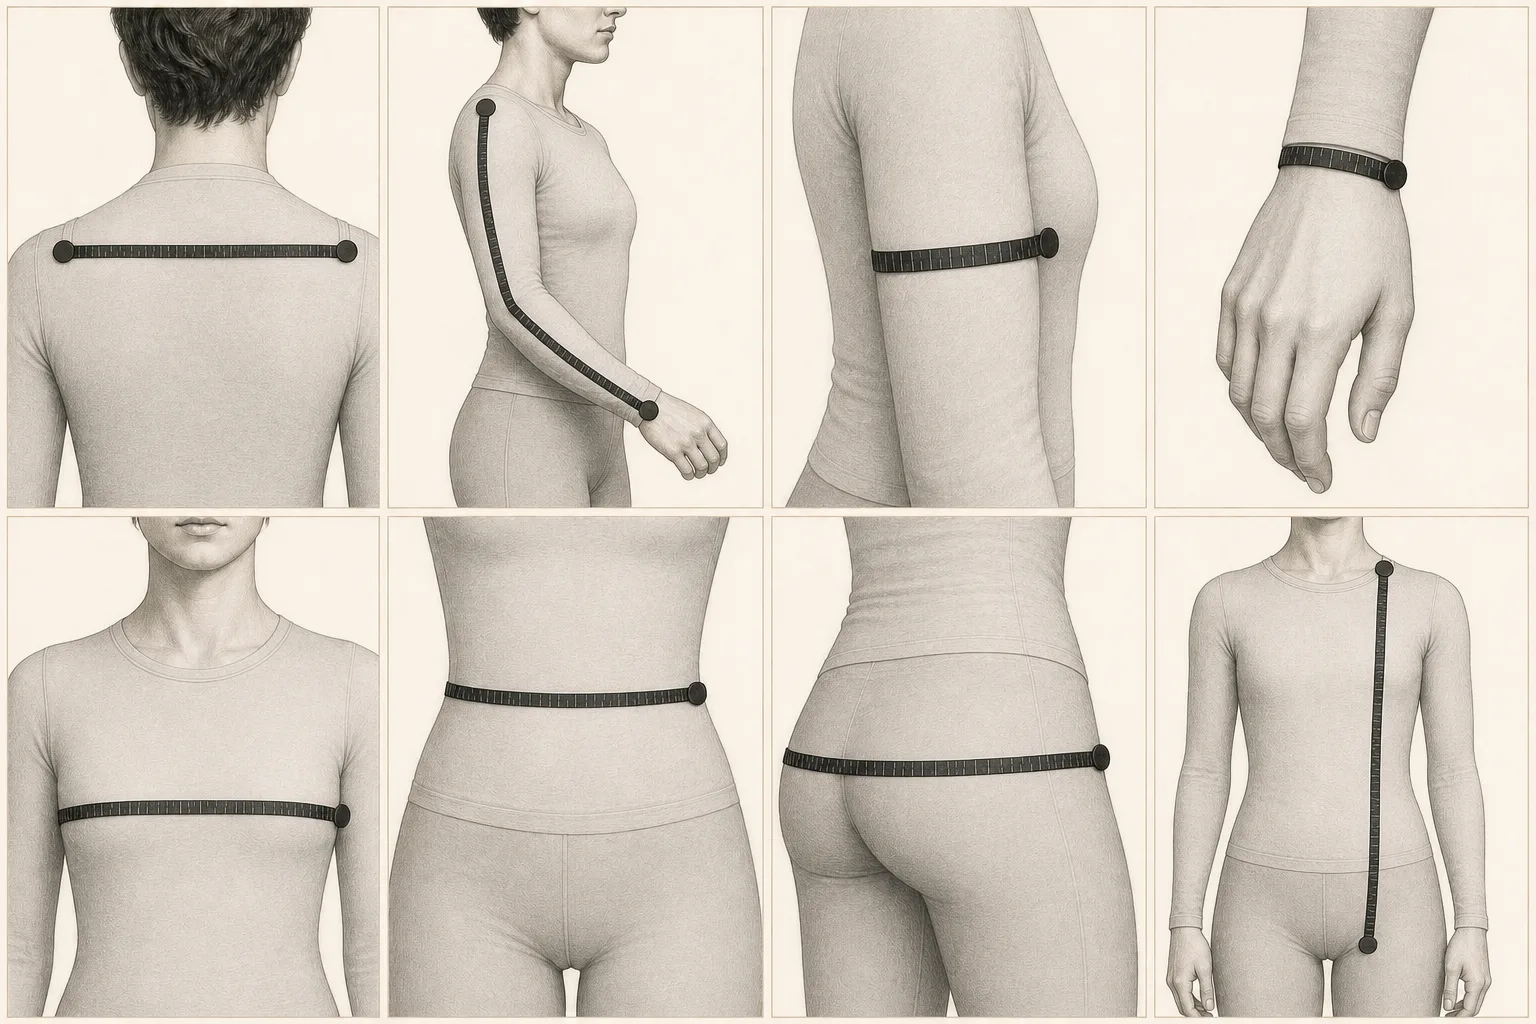
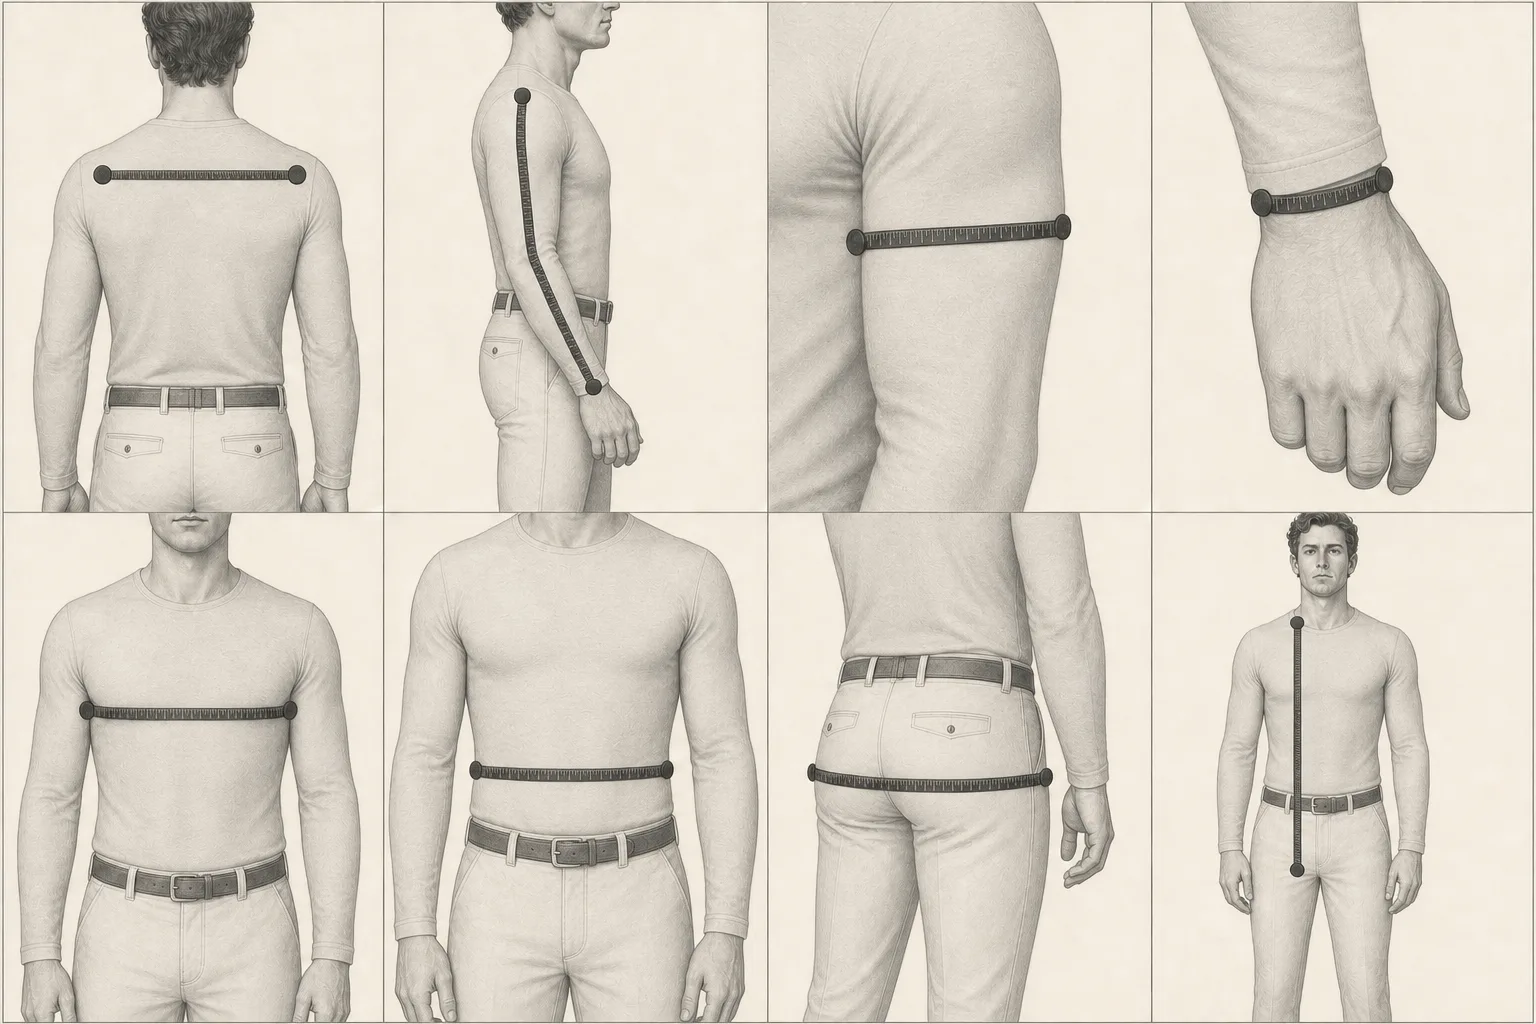
The eight measurements in Vainqueur's sizing flow do not compete with each other. They complete each other. Together they describe three things: the frame on which the jacket sits, the volume it must follow and the vertical line that decides where sleeves and hem should finish.
1. Chest: the starting point, not the final answer
The chest is often the first reference because it occupies the centre of the garment. The tape runs around the fullest part, parallel to the floor, without holding the breath or compressing the body. It helps point towards a size range, but only makes sense beside the waist, hips and back.
2. Waist: where the silhouette gains definition
The natural waist is the narrowest area of the torso. Pulling the tape too tightly promises a fit the body cannot sustain in motion; leaving it too loose erases its real definition. The tape should simply touch. The difference between chest and waist, more than either number alone, begins to describe the body's shape.
3. Hips: room to sit, rise and ride
The tape travels around the fullest part of the hips and seat. It matters because the jacket does not end at the waist: the hem must follow the body while standing and stay balanced in the saddle. Ignore this area and a garment that looks correct from the front may open, ride up or lose its line at the back.
4. Back width: the invisible structure
Measured from one shoulder point to the other across the upper back, it helps describe the base where sleeves and jacket body meet. This is a structural dimension. When it does not agree with the rest, a jacket can feel restricted even when chest and waist appear correct.
5. Arm length: where the sleeve should arrive
With the arm slightly bent, the tape follows from the shoulder point to the wrist bone, passing over the elbow. That small bend matters: a fully straight arm does not reproduce the position in which the sleeve works. Here we are measuring the body, not a finished jacket.
6. Biceps: freedom without excess
The circumference is taken around the fullest part of the upper arm with the muscle relaxed. It helps preserve mobility without turning the sleeve into a wide tube. Together with the back and chest, it contributes directly to freedom through the upper body.
7. Wrist: the sleeve's finishing point
The wrist is measured over the bone with the tape flat. It sounds minor, yet it helps organise the sleeve opening and its relationship with the hand. Too wide and the finish loses precision; too close and comfort suffers when dressing and moving.
8. Jacket length: the line that balances everything
This measurement begins at the base of the neck in the centre back and travels down to the desired hem. It defines proportion. A few centimetres higher or lower can change the whole silhouette, especially as the body moves from standing to riding position.
Measuring a body is not measuring a finished jacket
This distinction prevents many errors. Chest, waist and hips are body circumferences; back, arm and length follow anatomical points. A finished garment already contains ease, construction and its own proportions. Copying its dimensions and treating them as body measurements mixes two different languages.
For a cleaner result, measure over light clothing, keep the tape parallel to the floor for circumferences and ask another person to help when possible. The body should remain natural. Holding the breath, drawing in the stomach or pulling the tape tight produces accurate numbers for a posture no one maintains.
The best size is a collective decision
In the official-size path, the free validator compares these eight body measurements with finished-jacket specifications before checkout. Personal Fit may refine eligible lengths, but it does not replace the selected standard pattern. In the separate made-to-measure path, the customer buys first, then submits guided measurements for human review and an individual pattern. Compare both paths.
That boundary matters because responsible fitting does not promise to turn any size into any body. It finds the correct foundation first, then refines what can responsibly be refined. The tape provides the numbers. Fit comes from reading the relationships between them.
Use a flexible tape, wear light clothing and ask for help if possible. In the Vainqueur Digital Atelier, each step shows exactly where to place the tape before validating a size.